一、背景
在Iaas,Paas,Saas层出不穷的时代,这里给大家安利一款比较热门的PaaS服务Heroku。
为啥博主推荐它呢,因为他提供了免费的服务,方便我们部署各种web应用。
本文以初识heroku的角度来介绍,教大家如何修改wordpress的源码,
让heroku自动部署一个wordpress给我们,从而对heroku功能有个大体的了解。
二、Heroku介绍
Heroku是Salesforce旗下是一个PaaS服务服务商,提供方便便捷的各种云服务,
如服务器,数据库,监控,计算等等。
并且他提供了免费版本,这使得我们这些平时想搞一些小东西的人提供了莫大的便捷,
虽然他有时长和宕机的限制,但是对于个人小程序来说已经足够了。
如果有想直接部署WordPress的小伙伴,可跳过本文,参考如下另一篇文章。
如有问题欢迎留言。
三、环境
四、工具安装
① 可登陆heroku的云主机,安装Heroku-CLI,root用户运行如下命令
[root@myaliecs ~]# curl https://cli-assets.heroku.com/install.sh | sh
  % Total    % Received % Xferd  Average Speed   Time    Time     Time  Current
                                 Dload  Upload   Total   Spent    Left  Speed
100  1892  100  1892    0     0   4595      0 --:--:-- --:--:-- --:--:--  4592
Installing CLI from https://cli-assets.heroku.com/heroku-linux-x64.tar.xz
  % Total    % Received % Xferd  Average Speed   Time    Time     Time  Current
                                 Dload  Upload   Total   Spent    Left  Speed
100 17.6M  100 17.6M    0     0  5627k      0  0:00:03  0:00:03 --:--:-- 5628k
v12.13.0
heroku installed to /usr/local/bin/heroku
heroku/7.39.1 linux-x64 node-v12.13.0
[root@myaliecs ~]# heroku --version
heroku/7.39.1 linux-x64 node-v12.13.0
heroku提供了Command-Line interface,让用户可以跨平台使用CLI来控制heroku。
② 登陆heroku
[root@myaliecs ~]# heroku login
heroku: Press any key to open up the browser to login or q to exit:
Opening browser to https://cli-auth.heroku.com/auth/cli/browser/6d2b2960-1789-42ac-906f-0e2e6146dc4d
 ›   Warning: Cannot open browser.
Logging in... done
Logged in as chentranskey@gmail.com
[root@myaliecs ~]#
③ 安装gitbash,默认安装,一直下一步直到完成。
五、Wordpress代码仓库创建
① 下载如下源码包
heroku只有pgsql免费,wordpress是默认使用mysql,所以要装一个插件PG4WP!
② git仓库初始化
解压下载的源码包wordpress-5.0.3-zh_CN.zip, 重命名解压目录为wordpress-for-heroku
打开gitbash进入cd该目录,初始化并提交仓库。
cd wordpress-for-heroku
git init
git add .
git commit -m "init wordpress-5.0.3-zh_CN"
③ 创建代码分支
git branch -avv  # 查询分支
* master                b641a84 [origin/master: ahead 1] init wordpress-5.0.3-zh_CN
  remotes/origin/HEAD   -> origin/master
  remotes/origin/master 076d57b Initial commit

$ git checkout -b product # 创建并切到该分支
Switched to a new branch 'product'
④ 修改源码
- 解压
PostgreSQL for WordPress (PG4WP)到wp-content文件夹下 - wp-content/
pg4wp文件夹里面的db.php文件复制到wp-content文件夹下 - 复制配置文件wp-config-sample.php文件为
wp-config.php - 修改
wp-config.php文件,添加数据库账号、密码等信息(使用heroku的pg) - 追加SSL_LOGIN
cd wordpress-for-heroku
cp -pf wp-content/pg4wp/db.php wp-content/
cp -pf wp-config-sample.php wp-config.php
vim wp-config.php
vim wp-includes/functions.phpwp-config.php修改内容
# 删除如下
/** WordPress数据库的名称 */
define('DB_NAME', 'database_name_here');

/** MySQL数据库用户名 */
define('DB_USER', 'username_here');

/** MySQL数据库密码 */
define('DB_PASSWORD', 'password_here');

/** MySQL主机 */
define('DB_HOST', 'localhost');

#=> 追加
// ** MySQL settings - You can get this info from your web host ** //
$db = parse_url($_ENV["DATABASE_URL"]);   ## heroku 环境变量

/** The name of the database for WordPress */
define('DB_NAME', trim($db["path"],'/'));

/** MySQL database username */
define('DB_USER', $db["user"]);

/** MySQL database password */
define('DB_PASSWORD', $db["pass"]);

/** MySQL hostname */
define('DB_HOST', $db["host"]);

#=> 追加 SSL_LOGIN
+$_SERVER['HTTPS'] = 'on';
+define('FORCE_SSL_LOGIN', true);
+define('FORCE_SSL_ADMIN', true);wp-includes/functions.php添加内容
add_filter('script_loader_src', 'agnostic_script_loader_src', 20,2); function agnostic_script_loader_src($src, $handle) { return preg_replace('/^(http|https):/', '', $src); }
add_filter('style_loader_src', 'agnostic_style_loader_src', 20,2); function agnostic_style_loader_src($src, $handle) { return preg_replace('/^(http|https):/', '', $src); }
④ 创建product分支,提交修改
git add .
git commit -m "heroku化"
六、创建Heroku app
① 切到云主机输入如下,创建一个heroku app
heroku creat ck-wp-demo ## ck-wp-demo:app的名字app名字唯一的,如有报重复换一个,此为url的一部分
② 查看app相关信息
[root@myaliecs ~]# heroku apps
=== chentranskey@gmail.com Apps
ck-wp-demo

[root@myaliecs ~]# heroku apps:info ck-wp-demo
=== ck-wp-demo
Addons:         heroku-postgresql:hobby-dev ## 加了addons才有
Auto Cert Mgmt: false
Dynos:          web: 1
Git URL:        https://git.heroku.com/ck-wp-demo.git
Owner:          chentranskey@gmail.com
Region:         us
Repo Size:      11 MB
Slug Size:      25 MB
Stack:          heroku-18
Web URL:        https://ck-wp-demo.herokuapp.com/
七、创建Heroku Postgres
① 创建addons,添加数据库
[root@myaliecs wordpress-for-heroku]# heroku addons:creat heroku-postgresql -a ck-wp-demo
 ›   Warning: addons:creat is not a heroku command.
Did you mean addons:create? [y/n]: y
Creating heroku-postgresql on ⬢ ck-wp-demo... free
Database has been created and is available
 ! This database is empty. If upgrading, you can transfer
 ! data from another database with pg:copy
Created postgresql-parallel-49831 as DATABASE_URL
Use heroku addons:docs heroku-postgresql to view documentation

[root@myaliecs wordpress-for-heroku]# heroku addons --all
Owning App  Add-on                        Plan                         Price  State
──────────  ────────────────────────────  ───────────────────────────  ─────  ───────
ck-wp-demo  postgresql-parallel-49831     heroku-postgresql:hobby-dev  free   created
② 参看数据库配置信息
[root@myaliecs wordpress-for-heroku]# heroku config -a ck-wp-demo
=== ck-wp-demo Config Vars
DATABASE_URL: postgres://ciglzeccnngrma:****@ec2-34-200-101-236.compute-1.amazonaws.com:5432/d4akhbfb868uvhheroku创建了个的数据库给我们,不难发现他在AWS云上DATABASE_URL里记录了访问的账号,密码,服务器,端口,dbDATABASE_URL:postgres://user:passwd@hostname:port/db
DATABASE_URL:前面修改的wp-config.php的相关信息
## wp-config.php
// ** MySQL settings - You can get this info from your web host ** //
$db = parse_url($_ENV["DATABASE_URL"]);   ## heroku 环境变量
③ 前往heroku dashboard查看,APP找到ck-wp-demo -> Resources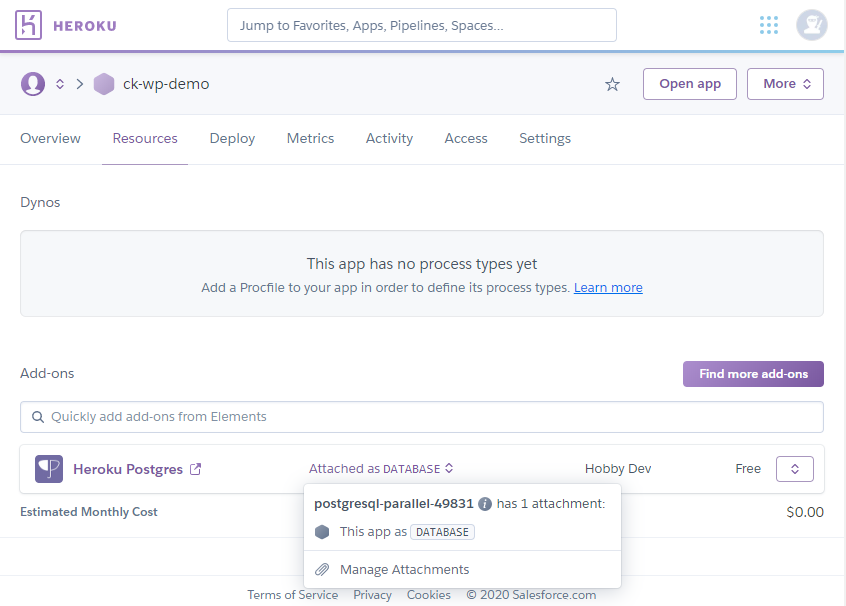
点击 Heroku Postgres,查看具体信息
④ 客户端连接数据库
方式一、Windows机子用navicat连接数据库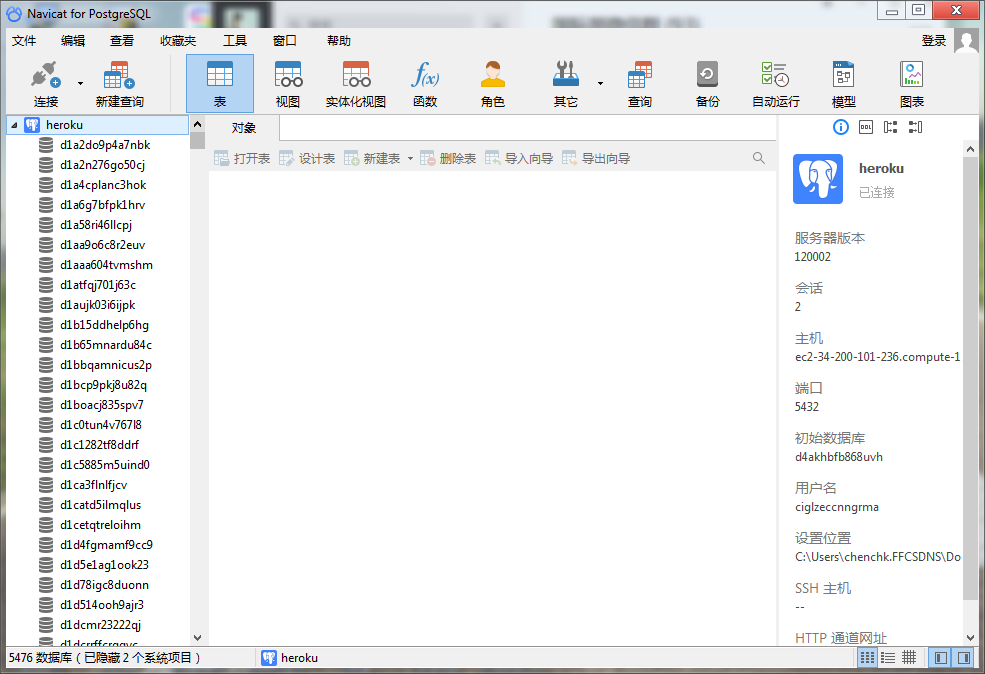
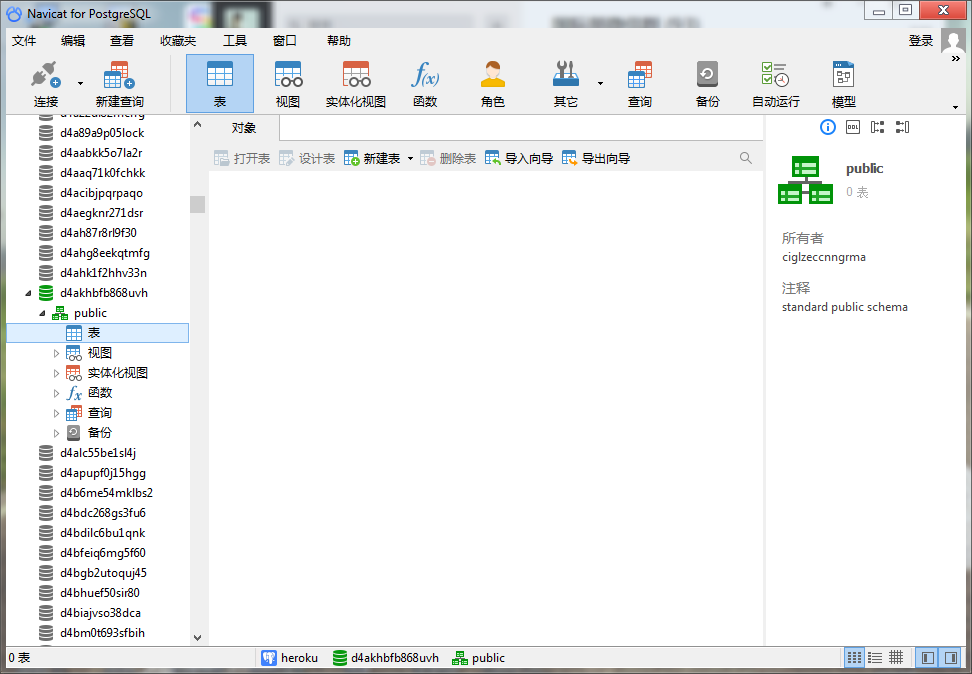
方式二、Linux用Heroku-cli
[root@myaliecs wordpress-for-heroku]# yum install postgresql
[root@myaliecs wordpress-for-heroku]# heroku pg:psql
--> Connecting to postgresql-parallel-49831
psql (9.2.24, server 12.2 (Ubuntu 12.2-2.pgdg16.04+1))
WARNING: psql version 9.2, server version 12.0.
         Some psql features might not work.
SSL connection (cipher: ECDHE-RSA-AES256-GCM-SHA384, bits: 256)
Type "help" for help.

ck-wp-demo::DATABASE=> \l
                                             List of databases
      Name      |     Owner      | Encoding |   Collate   |    Ctype    |         Access privileges
----------------+----------------+----------+-------------+-------------+-----------------------------------
 d1019ltbluf2o7 | ozybjgobpcinoe | UTF8     | en_US.UTF-8 | en_US.UTF-8 | ozybjgobpcinoe=CTc/ozybjgobpcinoe
 d102afqr36rop  | dyzpslhrzqawps | UTF8     | en_US.UTF-8 | en_US.UTF-8 | dyzpslhrzqawps=CTc/dyzpslhrzqawps
 d102kk104vlv11 | vhjsimijxregxc | UTF8     | en_US.UTF-8 | en_US.UTF-8 | vhjsimijxregxc=CTc/vhjsimijxregxc
 d104c737brnen  | meoknvjjrvhxxz | UTF8     | en_US.UTF-8 | en_US.UTF-8 | meoknvjjrvhxxz=CTc/meoknvjjrvhxxz


ck-wp-demo::DATABASE=> \c d4akhbfb868uvh
psql (9.2.24, server 12.2 (Ubuntu 12.2-2.pgdg16.04+1))
WARNING: psql version 9.2, server version 12.0.
         Some psql features might not work.
SSL connection (cipher: ECDHE-RSA-AES256-GCM-SHA384, bits: 256)
You are now connected to database "d4akhbfb868uvh" as user "ciglzeccnngrma".

ck-wp-demo::DATABASE=> SELECT version();
 PostgreSQL 12.2 (Ubuntu 12.2-2.pgdg16.04+1) on x86_64-pc-linux-gnu, compiled by gcc (Ubuntu 5.4.0-6ubuntu1~16.04.12) 5.4.0 20160609, 64-bit

ck-wp-demo::DATABASE=> \dt
 public | wp_commentmeta        | table | ciglzeccnngrma
 public | wp_comments           | table | ciglzeccnngrma
 public | wp_links              | table | ciglzeccnngrma
 public | wp_options            | table | ciglzeccnngrma
 public | wp_postmeta           | table | ciglzeccnngrma
 public | wp_posts              | table | ciglzeccnngrma
 public | wp_term_relationships | table | ciglzeccnngrma
 public | wp_term_taxonomy      | table | ciglzeccnngrma
 public | wp_termmeta           | table | ciglzeccnngrma
 public | wp_terms              | table | ciglzeccnngrma
 public | wp_usermeta           | table | ciglzeccnngrma
 public | wp_users              | table | ciglzeccnngrma

ck-wp-demo::DATABASE=> select * from wp_users;
1| admin | ******* | admin | ******* | | 2020-03-30 14:46:13 | | 0 | admin
八、Heroku自动部署
① 追加Heroku的远程代码仓库
[root@myaliecs wordpress-for-heroku]# git remote add heroku https://git.heroku.com/ck-wp-demo.git
[root@myaliecs wordpress-for-heroku]# git remote -v
heroku  https://git.heroku.com/ck-wp-demo.git (fetch)
heroku  https://git.heroku.com/ck-wp-demo.git (push)
② 将本地product分支推向heroku的master分支,并自动构建部署
[root@myaliecs wordpress-for-heroku]# git branch -avv
  master                 b641a84 [origin/master] init wordpress-5.0.3-zh_CN
* product                85cd7ec "heroku化"
  remotes/origin/HEAD    -> origin/master
  remotes/origin/master  b641a84 init wordpress-5.0.3-zh_CN
  remotes/origin/product 85cd7ec "heroku化"

[root@myaliecs wordpress-for-heroku]# git push heroku product:master  # git push <远程主机名> <本地分支名>:<远程分支名>
Total 0 (delta 0), reused 0 (delta 0)
remote: Compressing source files... done.
remote: Building source:
remote:
remote: -----> PHP app detected
remote:
remote:  !     WARNING: No 'composer.json' found!
remote:  !
remote:  !     Your project only contains an 'index.php', no 'composer.json'.
remote:  !
remote:  !     Using 'index.php' to declare app type as PHP is deprecated and
remote:  !     may lead to unexpected behavior.
remote:  !
remote:  !     Please consider updating your codebase to utilize Composer and
remote:  !     modern dependency management in order to benefit from the latest
remote:  !     PHP runtimes and improved application performance, as well as
remote:  !     control over the PHP versions and extensions available.
remote:  !
remote:  !     For an introduction to dependency management with Composer and
remote:  !     how to get the most out of PHP on Heroku, refer to the docs at
remote:  !     https://getcomposer.org/doc/00-intro.md and
remote:  !     https://devcenter.heroku.com/articles/getting-started-with-php
remote:
remote: -----> Bootstrapping...
remote: -----> Installing platform packages...
remote:        NOTICE: No runtime required in composer.lock; using PHP ^7.0.0
remote:        - apache (2.4.41)
remote:        - nginx (1.16.1)
remote:        - php (7.4.4)
remote: -----> Installing dependencies...
remote:        Composer version 1.10.1 2020-03-13 20:34:27
remote: -----> Preparing runtime environment...
remote:        NOTICE: No Procfile, using 'web: heroku-php-apache2'.
remote: -----> Checking for additional extensions to install...
remote: -----> Discovering process types
remote:        Procfile declares types -> web
remote:
remote: -----> Compressing...
remote:        Done: 24.6M
remote: -----> Launching...
remote:        Released v9
remote:        https://ck-wp-demo.herokuapp.com/ deployed to Heroku
remote:
remote: Verifying deploy... done.
To https://git.heroku.com/ck-wp-demo.git
b641a84..6031d3f product -> master自动deloy,然后没报错就说明成功部署了。
站点地址:https://ck-wp-demo.herokuapp.com/
会发现,requirements/Procfile/runtime都没定义,但是heroku自动识别了。
三个描述文件其实是必备的,这几个文件作用后续在做介绍。
九、WordPress设置
① 访问wordpress首页,对数据库做初始化,填写个人信息。https://ck-wp-demo.herokuapp.com/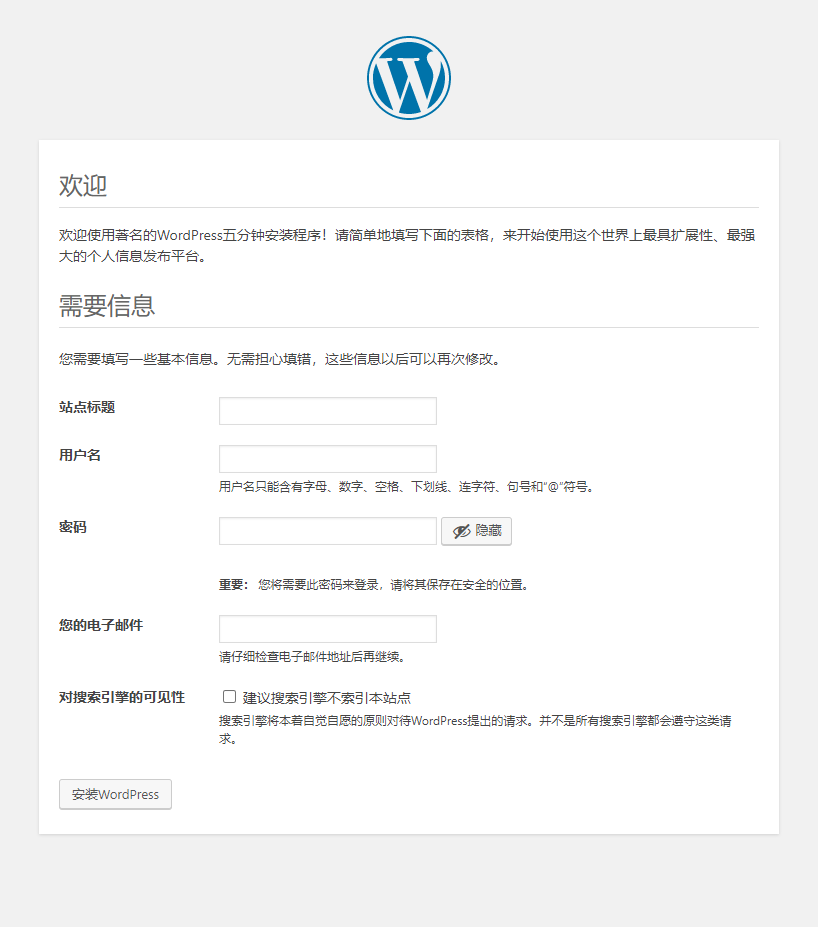
② 安装WordPress,出现安装成功,点登陆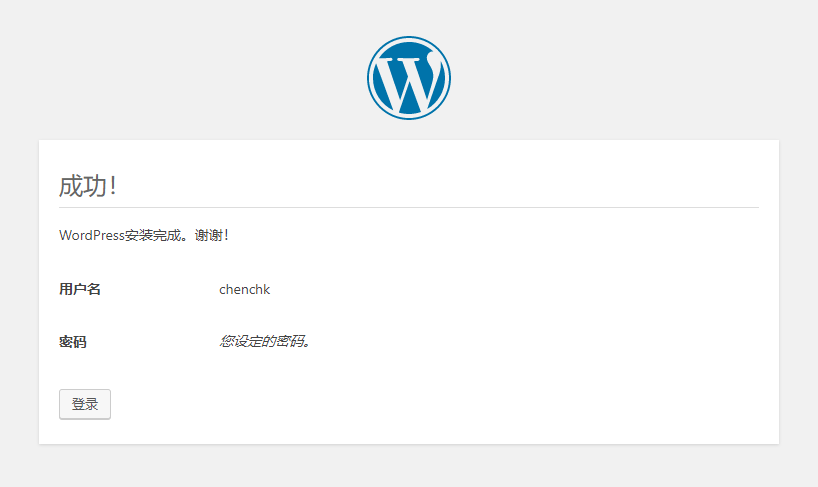
③ 登陆wordpress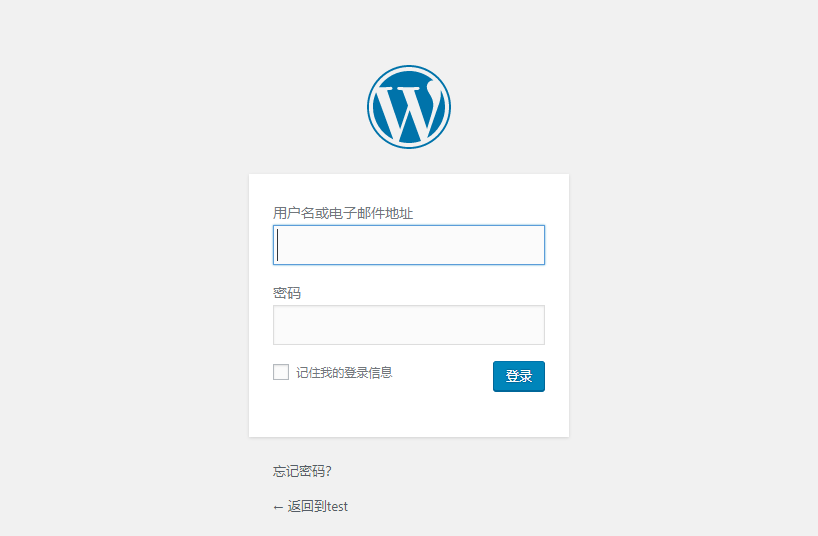

这样我们的wordpress就部署完了
十、Heroku Log 查阅
方便用户查看web的access/应用 log
[root@myaliecs ~]# heroku logs -a ck-wp-demo --tail
2020-09-08T10:29:20.817776+00:00 heroku[web.1]: Unidling
2020-09-08T10:29:20.820053+00:00 heroku[web.1]: State changed from down to starting
2020-09-08T10:29:22.971240+00:00 heroku[web.1]: Starting process with command `heroku-php-apache2`
2020-09-08T10:29:26.321549+00:00 app[web.1]: Detected 536870912 Bytes of RAM
2020-09-08T10:29:26.354937+00:00 app[web.1]: PHP memory_limit is 128M Bytes
2020-09-08T10:29:26.365570+00:00 app[web.1]: Starting php-fpm with 4 workers...
2020-09-08T10:29:26.493258+00:00 app[web.1]: Starting httpd...
2020-09-08T10:29:27.342214+00:00 heroku[web.1]: State changed from starting to up
2020-09-08T10:29:29.329625+00:00 heroku[router]: at=info method=POST path="/wp-cron.php?doing_wp_cron=1599560968.3515489101409912109375" host=ck-wp-demo.herokuapp.com request_id=d205f3db-4bab-430b-9188-de056433da35 fwd="18.208.177.221" dyno=web.1 connect=1ms service=890ms status=200 bytes=150 protocol=https
2020-09-08T10:29:29.330291+00:00 app[web.1]: 10.43.188.220 - - [08/Sep/2020:10:29:28 +0000] "POST /wp-cron.php?doing_wp_cron=1599560968.3515489101409912109375 HTTP/1.1" 200 - "https://ck-wp-demo.herokuapp.com/wp-cron.php?doing_wp_cron=1599560968.3515489101409912109375" "WordPress/5.0.3; https://ck-wp-demo.herokuapp.com
2020-09-08T10:29:29.370360+00:00 app[web.1]: 10.29.126.9 - - [08/Sep/2020:10:29:27 +0000] "GET /wp-admin/install.php HTTP/1.1" 200 1125 "-" "Mozilla/5.0 (Windows NT 10.0; Win64; x64) AppleWebKit/537.36 (KHTML, like Gecko) Chrome/85.0.4183.83 Safari/537.36
2020-09-08T10:29:29.370962+00:00 heroku[router]: at=info method=GET path="/wp-admin/install.php" host=ck-wp-demo.herokuapp.com request_id=64f8e3e1-8727-4fd4-9ac1-fee9d4c7a37d fwd="61.154.14.120" dyno=web.1 connect=0ms service=1511ms status=200 bytes=1389 protocol=https
2020-09-08T10:29:32.297592+00:00 app[web.1]: 10.31.112.211 - - [08/Sep/2020:10:29:32 +0000] "GET /wp-admin/css/install.min.css?ver=5.0.3 HTTP/1.1" 200 5870 "https://ck-wp-demo.herokuapp.com/wp-admin/install.php" "Mozilla/5.0 (Windows NT 10.0; Win64; x64) AppleWebKit/537.36 (KHTML, like Gecko) Chrome/85.0.4183.83 Safari/537.36
2020-09-08T10:29:32.297657+00:00 heroku[router]: at=info method=GET path="/wp-admin/css/install.min.css?ver=5.0.3" host=ck-wp-demo.herokuapp.com request_id=18d30752-dc15-42c8-a585-ae3ba1d1bfb9 fwd="61.154.14.120" dyno=web.1 connect=0ms service=1ms status=200 bytes=6103 protocol=https
2020-09-08T10:29:32.308863+00:00 app[web.1]: 10.29.126.9 - - [08/Sep/2020:10:29:32 +0000] "GET /wp-includes/css/buttons.min.css?ver=5.0.3 HTTP/1.1" 200 6077 "https://ck-wp-demo.herokuapp.com/wp-admin/install.php" "Mozilla/5.0 (Windows NT 10.0; Win64; x64) AppleWebKit/537.36 (KHTML, like Gecko) Chrome/85.0.4183.83 Safari/537.36
2020-09-08T10:29:32.309498+00:00 heroku[router]: at=info method=GET path="/wp-includes/css/buttons.min.css?ver=5.0.3" host=ck-wp-demo.herokuapp.com request_id=baa660e5-c214-42e4-bdff-1222c2da1f94 fwd="61.154.14.120" dyno=web.1 connect=1ms service=1ms status=200 bytes=6310 protocol=https
2020-09-08T10:29:33.044367+00:00 heroku[router]: at=info method=GET path="/wp-includes/css/dashicons.min.css?ver=5.0.3" host=ck-wp-demo.herokuapp.com request_id=05c59ee2-52b4-45cb-874e-541b4a003a27 fwd="61.154.14.120" dyno=web.1 connect=0ms service=3ms status=200 bytes=46594 protocol=https另外,heroku上没办法在线更新东西,如果需要下载主题或版本,
可以下载到自己的代码里然后推到heroku上。
下篇文章会介绍详细介绍前面deloy on heroku的步骤及绑定自己的域名,访问heroku的app


感谢分享
感谢